Tak się nieszczęśliwie poukładało w moim życiu, że na jakiś czas wylądowałem z windowsowym laptopem. Zawsze kiedy musiałem korzystać z systemu MS instalowałem od razu Cygwina. Niestety czasami nie była to “bułka z masłem”, często coś tam nie do końca działało albo były problemy z samą instalacją. Zdarzało się, że trochę pracy było potrzebne ale i tak świetnie, że komuś się chciało i Cygwin w ogóle powstał. Teraz jest jeszcze lepiej bo powstało coś dającego Cygwina w bardzo fajnym opakowaniu. Mowa o Babun.
Instalacja
Sprowadza się do pobrania archiwum, rozpakowania i uruchomieniu skryptu. Standardowo instaluje się w katalogu domowym jako .babun.
Pierwsze wrażenia
Na pulpicie tworzy się skrót, który uruchamia terminal mintty a tam od razu mamy skonfigurowane zsh i jest git. Instalacja/deinstalacja pakietów za pomocą pact install oraz pact remove jest dużym plusem. Usunięcie Babun-a to skasowania jego katalogu, uwielbiam tego typu programy :)
Serwer SSH
Serwer SSH na Windowsie to chyba nigdy nie było proste. Tutaj też nie działa bez drobnych modyfikacji ale nie jest najgorzej. No i trzeba przyznać, że w Windows 8.1 dodawanie i usuwanie serwisów nawet z poziomu Babuna/Cygwina nie wymaga restartu. Miłe zaskoczenie.
Zaczynamy od uruchomienia Babuna jako Administrator i wydajemy następujące komendy:
/usr/bin/chmod +r /etc/passwd
/usr/bin/chmod +r /etc/group
/usr/bin/chmod +x /var
/usr/bin/ssh-host-config
Proces instalacji wyglądał u mnie tak:
ssh-keygen: generating new host keys: RSA1 RSA DSA ECDSA ED25519
*** Info: Creating default /etc/ssh_config file
*** Info: Creating default /etc/sshd_config file
*** Info: Privilege separation is set to yes by default since OpenSSH 3.3.
*** Info: However, this requires a non-privileged account called 'sshd'.
*** Info: For more info on privilege separation read /usr/share/doc/openssh/README.privsep.
*** Query: Should privilege separation be used? (yes/no) yes
*** Info: Note that creating a new user requires that the current account have
*** Info: Administrator privileges.  Should this script attempt to create a
*** Query: new local account 'sshd'? (yes/no) yes
*** Info: Updating /etc/sshd_config file

*** Query: Do you want to install sshd as a service?
*** Query: (Say "no" if it is already installed as a service) (yes/no) yes
*** Query: Enter the value of CYGWIN for the daemon: [] ntsec
*** Info: On Windows Server 2003, Windows Vista, and above, the
*** Info: SYSTEM account cannot setuid to other users -- a capability
*** Info: sshd requires.  You need to have or to create a privileged
*** Info: account.  This script will help you do so.

*** Info: You appear to be running Windows XP 64bit, Windows 2003 Server,
*** Info: or later.  On these systems, it's not possible to use the LocalSystem
*** Info: account for services that can change the user id without an
*** Info: explicit password (such as passwordless logins [e.g. public key
*** Info: authentication] via sshd).

*** Info: If you want to enable that functionality, it's required to create
*** Info: a new account with special privileges (unless a similar account
*** Info: already exists). This account is then used to run these special
*** Info: servers.

*** Info: Note that creating a new user requires that the current account
*** Info: have Administrator privileges itself.

*** Info: No privileged account could be found.

*** Info: This script plans to use 'cyg_server'.
*** Info: 'cyg_server' will only be used by registered services.
*** Query: Do you want to use a different name? (yes/no) no
*** Query: Create new privileged user account 'cyg_server'? (yes/no) yes
*** Info: Please enter a password for new user cyg_server.  Please be sure
*** Info: that this password matches the password rules given on your system.
*** Info: Entering no password will exit the configuration.
*** Query: Please enter the password:
*** Query: Reenter:

*** Info: User 'cyg_server' has been created with password 'dynamic1'.
*** Info: If you change the password, please remember also to change the
*** Info: password for the installed services which use (or will soon use)
*** Info: the 'cyg_server' account.

*** Info: Also keep in mind that the user 'cyg_server' needs read permissions
*** Info: on all users' relevant files for the services running as 'cyg_server'.
*** Info: In particular, for the sshd server all users' .ssh/authorized_keys
*** Info: files must have appropriate permissions to allow public key
*** Info: authentication. (Re-)running ssh-user-config for each user will set
*** Info: these permissions correctly. [Similar restrictions apply, for
*** Info: instance, for .rhosts files if the rshd server is running, etc].


*** Info: The sshd service has been installed under the 'cyg_server'
*** Info: account.  To start the service now, call `net start sshd' or
*** Info: `cygrunsrv -S sshd'.  Otherwise, it will start automatically
*** Info: after the next reboot.

*** Info: Host configuration finished. Have fun!
Ustawienie odpowiednich uprawnień:
/usr/bin/chmod 600 /etc/ssh*
/usr/bin/chown cyg_server /etc/ssh*
/usr/bin/chmod 600 /var/empty
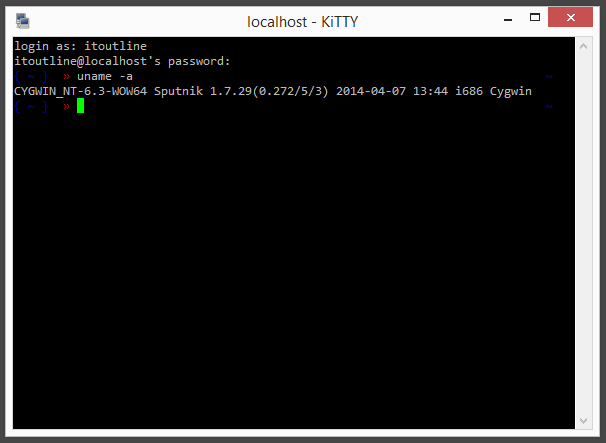
Uruchominie serwera SSH /usr/bin/cygrunsrv -S sshd i oto jesteśmy:
Gdyby coś poszło nie tak można usunąć konfigurację, potem katalog Babuna i spróbować jeszcze raz.
cygrunsrv --remove sshd
net user sshd /delete
net user cyg_server /delete
rm /etc/ssh_host* /etc/sshd_config
Python, virtualenv i np. Tornado
W Babunie mamy zainstalowanego pythona w wersji 2.7.3. Instalacja pip-a i serwera Tornado przeszła bez żadnych kłopotów. Pip:
wget https://raw.githubusercontent.com/pypa/pip/master/contrib/get-pip.py
python get-pip.py
Virtualenv:
pip install virtualenv
Tornado:
mkdir tornado-test
cd tornado-test
virtualenv venv
source venv/bin/activate
pip install tornado
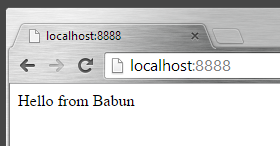
Kod serwera ;)
1 2 3 4 5 6 7 8 9 10 11 12 13 14 | |
Uruchomienie python server.py:
Ruby… i Octopress
Zdecydowanie najwięcej kłopotów, ale to nie jest jakoś bardzo dziwne. Niemniej jednak udało mi sie uruchomić Octopress-aa, było to tak:
Instalacja rbenv i ruby-build, zdecydowałem się nie korzystać z wersji oferowanej przez “pact”.
git clone https://github.com/sstephenson/rbenv.git ~/.rbenv
echo 'export PATH="$HOME/.rbenv/bin:$PATH"' >> ~/.zshrc
echo 'eval "$(rbenv init -)"' >> ~/.zshrc
git clone https://github.com/sstephenson/ruby-build.git ~/.rbenv/plugins/ruby-build
Aktywacja rbenv:
source ~/.zshrc
Instalacja wersji 1.9.3-p551 i ustawienie jej jako domyślnej.
rbenv install 1.9.3-p551
rbenv global 1.9.3-p551
Tutaj zaczynają się schody, zaczynamy od stworzenia pliku z bibliotekami jakie zainstalowały się z ruby.
find /home/$USER/.rbenv -iname '*.so' > /tmp/ruby.gems.local.so.lst
Zamykamy wszystkie sesje babuna i uruchamiamy dash.exe z katalogu .babun\cygwin\bin, tam wydajemy polecenie:
/usr/bin/rebaseall -v -T /tmp/ruby.gems.local.so.lst
Bez “rebaseall” podczas instalacji wymaganych bibliotek przez Octopress-a miałem takie problemy:
{ octopress } master » bundle install
Fetching gem metadata from https://rubygems.org/........
Resolving dependencies...
      0 [main] ruby 3412 child_info_fork::abort: address space needed by 'fcntl.so' (0x5F0000) is already occupied
      1 [main] ruby 2692 child_info_fork::abort: address space needed by 'fcntl.so' (0x5F0000) is already occupied
      0 [main] ruby 10092 child_info_fork::abort: address space needed by 'fcntl.so' (0x5F0000) is already occupied
      0 [main] ruby 3188 child_info_fork::abort: address space needed by 'fcntl.so' (0x5F0000) is already occupied
Instalacja Octopress-a:
git clone git://github.com/imathis/octopress.git octopress
cd octopress
gem install bundler
rbenv rehash
bundle install
Po “rebaseall” wygląda to lepiej:
{ octopress } master » bundle install
Fetching gem metadata from https://rubygems.org/........
Resolving dependencies...
Installing rake 10.4.2
Installing RedCloth 4.2.9
Installing blankslate 2.1.2.4
Installing hitimes 1.2.2
Installing timers 4.0.1
Installing celluloid 0.16.0
...
Kolejny krok to zmiana w pliku Rakefile z:
1 2 3 4 | |
na:
1 2 3 4 | |
Bez powyższego kroku miałem taki problem:
{ octopress } master » rake install
rake aborted!
Errno::ENOENT: No such file or directory - chcp 65001
/home/itoutline/octopress/Rakefile:32:in ``'
/home/itoutline/octopress/Rakefile:32:in `<top (required)>'
(See full trace by running task with --trace)
Wykonujemy rake install:
{ octopress } master » rake install
## Set the codepage to 65001 for Windows machines
## Copying classic theme into ./source and ./sass
mkdir -p source
cp -r .themes/classic/source/. source
mkdir -p sass
cp -r .themes/classic/sass/. sass
mkdir -p source/_posts
mkdir -p public
Następnie rake generate && rake preview:
{ octopress } master » rake generate && rake preview
## Set the codepage to 65001 for Windows machines
## Generating Site with Jekyll
directory source/stylesheets
    write source/stylesheets/screen.css
Configuration file: /home/itoutline/octopress/_config.yml
            Source: source
       Destination: public
      Generating...
                    done.
 Auto-regeneration: disabled. Use --watch to enable.
## Set the codepage to 65001 for Windows machines
Starting to watch source with Jekyll and Compass. Starting Rack on port 4000
[2014-12-29 15:22:08] INFO  WEBrick 1.3.1
[2014-12-29 15:22:08] INFO  ruby 1.9.3 (2014-11-13) [i386-cygwin]
[2014-12-29 15:22:08] WARN  TCPServer Error: Bad file descriptor - listen(2)
[2014-12-29 15:22:08] INFO  WEBrick::HTTPServer#start: pid=4924 port=4000
>>> Compass is watching for changes. Press Ctrl-C to Stop.
Configuration file: /home/itoutline/octopress/_config.yml
    write public/stylesheets/screen.css
            Source: source
       Destination: public
      Generating...
                    done.
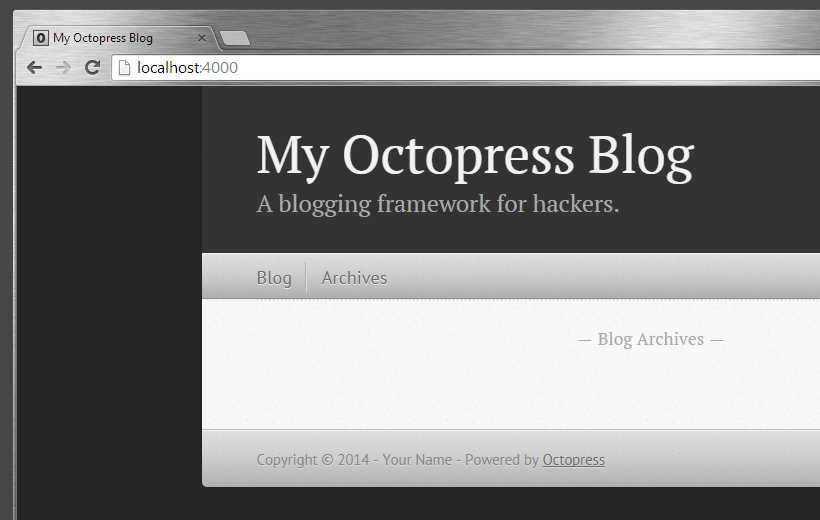
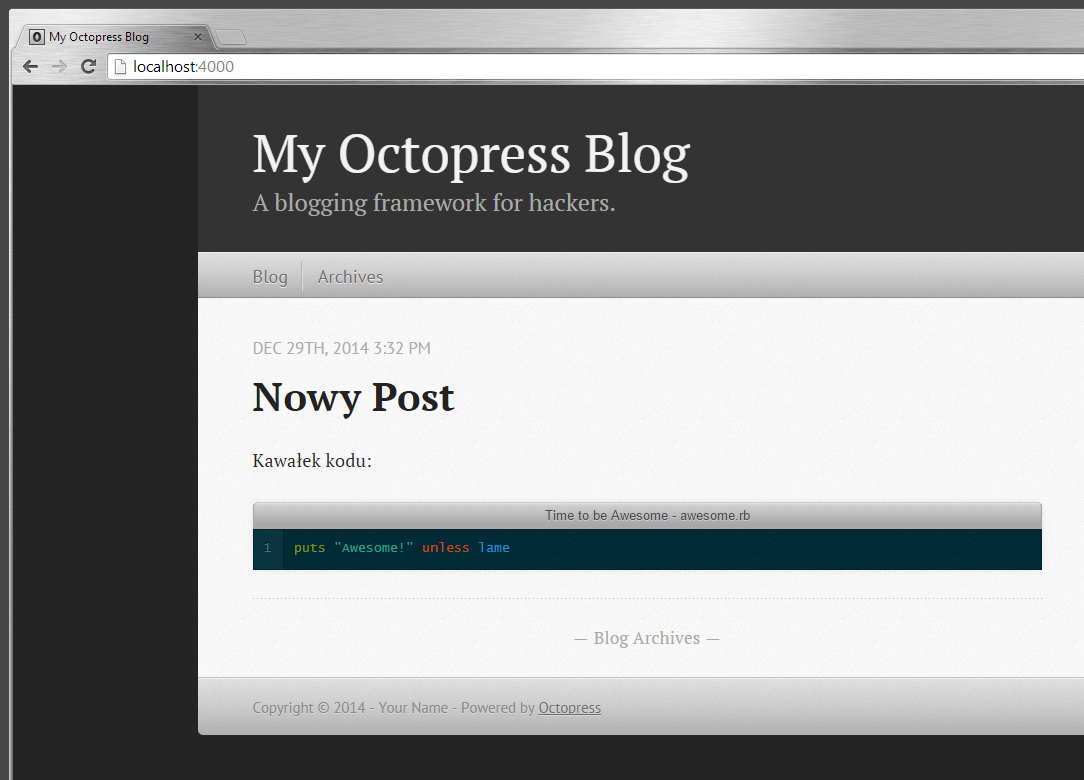
Mamy bloga:
Ale to nie wszystko, próba umieszczenia takiego wpisu:
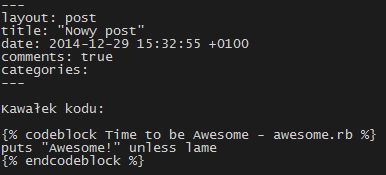
na blogu, zakończy się tak:
{ octopress } master » rake generate && rake preview
## Set the codepage to 65001 for Windows machines
## Generating Site with Jekyll
    write source/stylesheets/screen.css
Configuration file: /home/itoutline/octopress/_config.yml
            Source: source
       Destination: public
      Generating...
  Liquid Exception: No such file or directory - C:\Windows\system32\cmd.exe in _posts/2014-12-29-nowy-post.markdown/#excerpt
                    done.
 Auto-regeneration: disabled. Use --watch to enable.
## Set the codepage to 65001 for Windows machines
Starting to watch source with Jekyll and Compass. Starting Rack on port 4000
[2014-12-29 15:35:49] INFO  WEBrick 1.3.1
[2014-12-29 15:35:49] INFO  ruby 1.9.3 (2014-11-13) [i386-cygwin]
[2014-12-29 15:35:49] WARN  TCPServer Error: Bad file descriptor - listen(2)
[2014-12-29 15:35:49] INFO  WEBrick::HTTPServer#start: pid=7540 port=4000
Rozwiązaniem jest ustawienie COMSPEC:
export COMSPEC=/cygdrive/c/Windows/System32/cmd.exe
najlepiej od razu dodać do ~/.zshrc:
echo "export COMSPEC=/cygdrive/c/Windows/System32/cmd.exe" >> ~/.zshrc
Ostatni drobny kłopot to narzekanie na brak “python2” podczas generowania bloga:
which: no python2 in (/home/itoutline/.rbenv/versions/1.9.3-p551/lib/ruby/gems/1.9.1/bin:/home/itoutline/.rbenv/versions/1.9.3-p551/bin:/home/itoutline/.rbenv/libexec:/home/itoutline/.rbenv/plugins/ruby-build/bin:/home/itoutline/.rbenv/shims:/home/itoutline/.rbenv/bin:/home/itoutline/bin:/usr/local/bin:/usr/bin:/cygdrive/c/ProgramData/Oracle/Java/javap~...
Wystarczy utworzenie linku symbolicznego:
cd /usr/bin
ln -s python2.7.exe python2
“Chyba” wszystko działa:
Przed podsumowaniem
Czasami po uruchomieniu Babun-a może się pojawić coś takiego:
compdef: unknown command or service: git
compdef: unknown command or service: git
compdef: unknown command or service: git
compdef: unknown command or service: git
compdef: unknown command or service: git
compdef: unknown command or service: git
compdef: unknown command or service: git
{ ~ }  »
Nie jest tak, że to tylko u mnie. Rozwiązanie w postaci:
compinit
cp .zcompdump .zcompdump-$HOSTNAME-5.0.2
rzeczywiście działa.
Podsumowując
Fajnie, że jest Cygwin, że powstał Babun ale chyba zdecydowanie lepiej jest po prostu uruchomić wirtualną maszynę na Virtualboxie. Chyba, że mamy ograniczone zasoby sprzętowe, nie mamy uprawnień, lubimy “grzebać” albo potrzebujemy dostępu tylko do podstawowych narzędzi Linux/GNU. Jeśli chodzi o to ostatnie to Cygwin/Babun zdecydowanie wygrywa z wirtualną maszyną.